It have been a tough 3 months of virtual lab and hands-on training – so much learning, and I mean, intensive learning; combo with many sleepless nights and so much sweat and tears (maybe not the tears part but you get the point), I have finally passed my OSCP!
I am now officially an Offensive Security Certified Professional! Yes, I tried harder #tryharder 🙂

It have been a very tough 3 months of journey, which explains why I have not been blogging anything at all since then. I am happy to be back and blogging once again!
Okay, here comes my review about the course, specifically for any fellow aspiring ethical hacker like me, or simply anyone who have passion in the topic of computer security and wants to learn the technical side of the skill set.
A little bit about myself (for reference to the content below): I graduated from the National University of Singapore (NUS), School of Computing, Bachelor of E-Commerce, in 2014. Since then, I have been working as an IT Infrastructure Project Delivery Manager at a bank. In my role, I basically coordinates the completion of various deliverable for either the upgrading of existing systems or setting up of new systems. Up to this point, my job were not security related. To pursue my interest in information security, I left my job. I took up training courses and obtained my EC-Council Certified Ethical Hacker (CEHv9) certification during September 2016. Ever since then, I have been doing a lot of self learning on IT security stuff, especially from trying out hands on self-training by hacking the Virtual Machines downloadable from Vulnhub, you can read some of my write-ups over here.

Before you sign up for the OSCP course, it is essential to plan your time well! I made a mistake so I’d like you to learn from it. First, you have to know that to obtain the OSCP certification, you will need to register yourself for the Penetration Testing with Kali (PWK) course. The course consists of a virtual lab environment of which the credentials will be sent to you (along with training manual and videos) after you have successfully registered for the course. The mistake which I have made is to directly plan for a nice weekend (and a week with lesser work) to sign up for the course, thinking that I could get started immediately.
Listen/read: You will not start the course immediately. Courses will only start at certain days of each week, and each week can only have a limited number of students to start their PWK course, depending on the sign up rates, which will not be disclosed by Offensive Security. For my case, the earliest I could get started back then was 2 weeks after I have signed up for the course. Noticed the mistake here? I totally expected myself to be able to get started right after I signed up!

With the above mistake and poor time management at the start, I spent several days on the PDF lab manual exercises and the training videos. As reference, I started working on the lab machines 2 weeks after my PWK course commenced. Many people would recommend that you jump straight into the lab and not waste any time. I would like to disagree partially. While I believe that you could learn faster jumping into the lab straight, but there are some skill sets which you have to pick up before just jumping in straight.
Personally, I find that you should go through the lab manual on the chapter regarding various methods for file transfer. You should not miss the chapter for buffer overflow too, that is very important, as it teaches you how to craft your own simple fuzzer, shell code and modify the exploit. The fundamental enumeration techniques are very important too, specifically the chapter on using tools like nmap. Essentially, my point is — don’t just jump into the lab unless you know what you are doing. Learn the basics, and then jump in to try out the tools. When things are not right, jump out again. That is the whole point of the lab — for you to practice what you learnt and not just study the theory.
Regarding the learning curve, I must say that it really takes time to get your very first shell and it gets really addictive. Personally, it took me quite awhile to get my first shell even though it is just simply running the Metasploit tool. Don’t know about Metasploit? Fret not, it will be covered in the lab manual. Or you can complete the Metasploit Unleashed Free Ethical Hacking Course, like I did. It was good learning as well and most importantly, it is an Own Time Own Target (OTOT) kind of free online course. Be patient, shell will come, you just need to try harder, don’t give up.

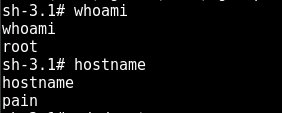
Thanks to the advise and encouragement from my mentor (Paul, that’s you), I took up the challenge of hacking Pain as my 10th machine. For those who don’t know what that means — Pain is one of the “boss” machine in the OSCP lab environment, along with his buddies: Sufferance, Humble and Gh0st. Hacking Pain as my 10th machine was no easy task. But like I said, I tried harder, it took my 8 days to root it. No joke, 8 days. Along the way, I learnt a lot of stuff I never imagined myself learning and also never expected myself to be able to understand. Of course, no spoilers, but really, just keep Googling and you will find it, trust me, and trust my mentor. Also thanks to these 8 days of being stuck on a machine, I kind of got used to the suffering (you know the feeling when you have no shells for a long time) and started to really pick up my pace moving forward.

While I am not going to spoon feed anyone with any post-enumeration scripts, I must say that you can always write your own scripts, or make use of available resources, there are several very good scripts around, for you to find out. One advise though, don’t just use it blindly. My peers Jin Kun and Ryan Teoh advised me the same when I was using the downloaded scripts happily initially too. There are cases where information are not presented to you directly, or when the operation system are not identical with the scripts target. In those cases, what are you going to do? Are you going to modify your script, do it manually, or give up? We never give up, so we have to understand what the script is doing. If you don’t understand it, don’t use it. Learn. It’s the same as Metasploit exploits — you run it, get shell, yay. Next, you should first, try to understand why that happened and try to get the same result without using Metasploit. The good thing is that in each of the Metasploit modules, you can run the command ‘info’ to read its description and you can read the source code of the modules directly in the “/usr/share/metasploit-framework/modules” directory. Like many people would have also shared with you, for privilege escalation, the only reference notes which you may need are probably just these list for Windows and Linux respectively. Learn and understand them and you are good to go.

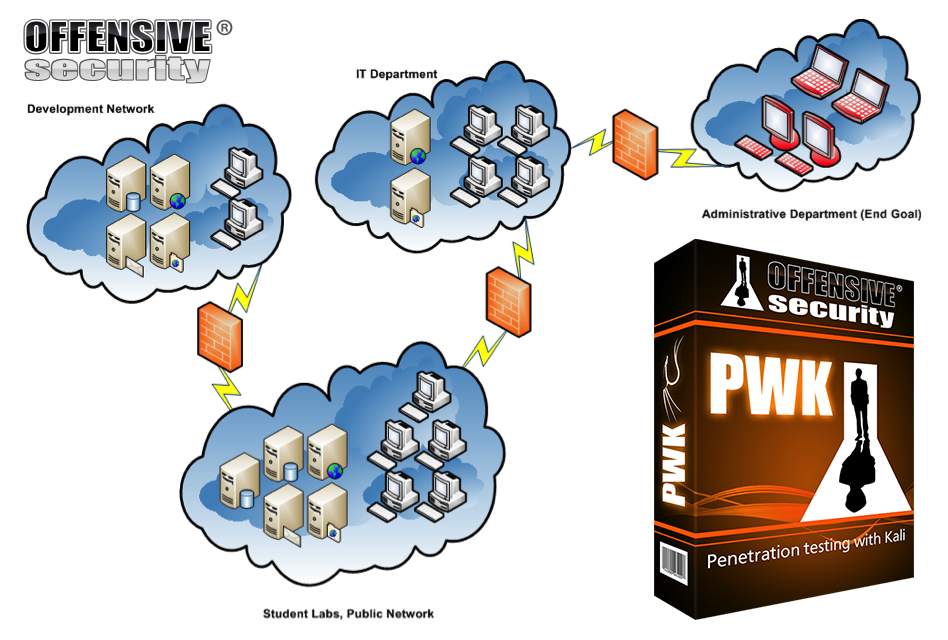
At the end of my lab time, I managed to make my way all the way into the Administrative department (as shown in the image above) and hacked some of the machines in there. During my 3 months of lab time, I managed to root 42 out of [spoiler, not going to tell you] machines. It was not that bad, it is possible, you have to believe in yourself.
Finally, it’s the exams. For those who are not familiar with the exam format, the hands-on exam duration is 23 hours and 45 minutes. There will be several machines for you to attack and get the “flags”. After your time is up, you will be cut off from the exam’s Virtual Private Network (VPN) and you will have to submit a professionally prepared lab report within the next 24 hours. This document should contain the testing process and step-by-step guides on how to replicate the vulnerability and get shell of the highest system privileges.

I was lucky because there were several components that were very similar to some of the machines which I have rooted previously in the lab. While I cannot specifically share what exactly are the components, I believe I can share that, if you keep working on getting more machines rooted and understand the vulnerabilities that you have exploited to root those machines, trust me — you will recognize it when you see it during the exams. Of course, the exam machines will not be so straight forward, but they will most likely be made up of several vulnerabilities (which you have already seen back then in the lab) being put together, where after exploiting one vulnerability, it leads to the discovery or/and exploitation of the next vulnerability. Again, time management is super important during the exams, you should not get stuck for too long and keep getting stuck in that particular spiral. Move on to the next machine and start enumerating for any attack vectors. Come back again later. Don’t give up. The only reason why the machine is there is because it is hackable, that is the only fact that you should remember during your exams!
To sum up, it was a very fruitful and enriching 3 months of lab time taking the PWK course. Definitely, if time allows, I would love to take up other courses from Offensive Security. A shout out: I am very thankful to my friends at Vantage Point Security, whom never fails to ask me about my progress on the lab machines and listen to my rants and gave me motivational speeches. Special thanks to Paul Craig, Jin Kun and Ryan Teoh, whom constantly gave me constructive advise and encouragement that keeps me going, not forgetting the many ping pong sessions whenever I am having mind blockage. Also thanks my family for supporting me! Lastly, my girlfriend is so awesome, for being so understanding and considerate towards me during my busy 3 months of journey towards getting my OSCP certification.
Good luck to anyone who wish to take up the challenge of becoming an Offensive Security Certified Professional (OSCP)!